
Automation First: Vendor Onboarding Workflow Ops Can Pilot in 30 Days

A vendor onboarding workflow is a risk-tiered, repeatable process that moves a new supplier from intake to active status in defined stages, each with an owner and a deadline. The first move is simple: standardize your intake form, assign one accountable owner per gate, and apply risk tiering before any document collection starts. A detailed 7-step version of that workflow, with owners and SLAs attached, follows below.
TL;DR:
- Vendors handling sensitive data or accessing core infrastructure automatically move to critical tier, requiring comprehensive security and legal reviews regardless of spend size.
- Automating intake validation and evidence collection with a self-service portal can reduce onboarding cycle time to between five and fifteen business days.
- Rigorous documentation verification, such as bank validation and certificate checks, prevents fraud and ensures onboarding records are audit-ready.
- Clear ownership and SLA targets for each onboarding step help identify bottlenecks and improve process efficiency, especially for high-priority vendors.
- Starting with a simple pilot using standardized forms, tier assignment, and a single evidence vault allows quick testing of improvements before scaling.
Table of Contents
- What Is a Vendor Onboarding Workflow and Why It Matters
- The 7-Step Vendor Onboarding Process, With Owners and SLAs
- How Risk Tiering Shapes the Depth of Review
- What Documents to Collect and How to Verify Them
- Where Automation Actually Reduces Manual Work
- Who Owns Each Approval and What to Measure
- The Bottlenecks That Slow Onboarding Down, and Quick Fixes
- A One-Page Checklist to Start This Week
- Why Onboarding Deserves Treatment as a Real Capability
- Run Your Vendor Onboarding Workflow Without the Manual Chasing
- Sources
- FAQ
What Is a Vendor Onboarding Workflow and Why It Matters
A vendor onboarding workflow sits at the front of the vendor lifecycle, before the first purchase order and before a single dollar moves. Its job is to produce four things: a clean vendor master record, verified banking details, a signed contract, and correctly scoped system access. Skip any of those and you inherit problems that surface months later, usually during an audit or a payment dispute.
Poor onboarding shows up in predictable ways. Duplicate vendor records creep into the ERP because two departments onboarded the same supplier under slightly different names. Payments bounce to outdated bank details because nobody re-verified an account after a vendor changed banks. Fraud gets a foothold when a fake invoice matches a vendor record that was never properly vetted in the first place.
A structured process closes those gaps by design, not by luck. It typically produces:
- A single, deduplicated vendor master record with a clear owner
- Verified payment details tied to a documented validation method
- Executed contracts with the right legal and security clauses attached
- System access scoped to what the vendor actually needs, nothing more
Treat onboarding as the first phase of a longer vendor risk-management cycle rather than a one-time gate, since a vendor’s risk profile can shift well after the paperwork is signed.
The 7-Step Vendor Onboarding Process, With Owners and SLAs
Most mature procurement teams converge on a version of the same 7-step framework, and for good reason: it maps cleanly onto swimlanes (procurement, legal, finance/AP, IT) and makes bottlenecks visible instead of hidden inside someone’s inbox. A common 7-step model runs from intake through go-live, and automated versions of it can push total cycle time down to 5 to 15 business days for most vendors.
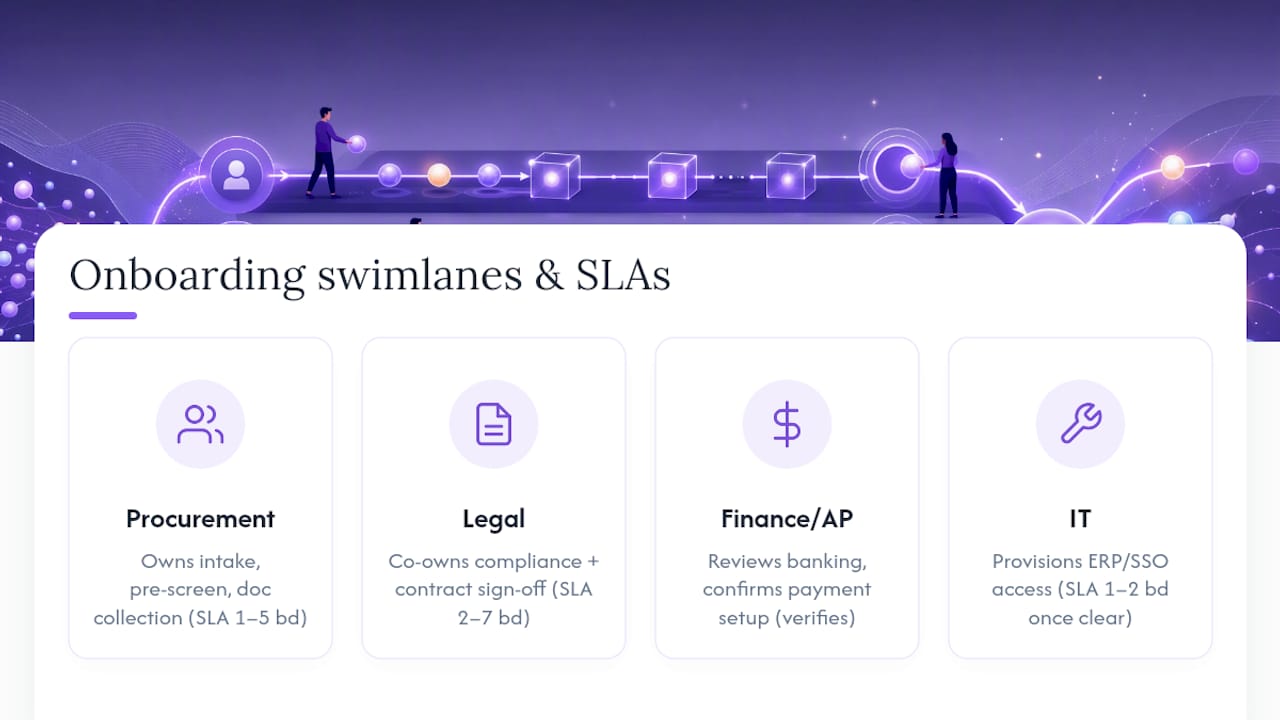
Here is the sequence, with the owner and a sample SLA for each step.
1. Intake and qualification. The requester (the internal employee who wants to use the vendor) submits a standardized intake form: legal entity name, tax ID, category of spend, expected annual spend, and whether the vendor will touch customer data or systems. Procurement owns this gate. SLA: form review and initial go/no-go within 1 business day.
2. Pre-screen and duplicate check. Procurement runs the submitted legal name and tax ID against the existing vendor master before anything else happens. This single step prevents most of the duplicate-vendor mess that plagues ERP systems for years afterward. SLA: same day as intake, ideally automated.
3. Documentation collection. The vendor submits tax forms (W-9 or W-8), banking information, a certificate of insurance, and, if applicable, a SOC 2 report and a data processing agreement. Procurement or the vendor portal owns collection; finance reviews banking specifics. SLA: 2 to 5 business days depending on vendor responsiveness.
4. Compliance and risk review. This is where the risk tier assigned in step 1 determines depth. A low-risk vendor might clear on self-attestation. A critical vendor touching sensitive data goes through a full security and legal review, including a look at the SOC 2 report and any pending litigation. Legal and IT security co-own this gate. SLA of a few days for low tier, longer for high or critical tier.
5. Contract and sign-off. Legal finalizes contract language, including a security schedule for any vendor handling data. Executive sign-off kicks in above a spend threshold you define, commonly anywhere from $25,000 to $100,000 depending on company size. SLA: 2 to 7 days, longer if redlines are involved.
6. System setup and access provisioning. IT creates the vendor record in the ERP, sets up AP sync, and provisions any system access through SSO or SCIM if the vendor needs a login. Finance confirms banking details are locked into the payment system. SLA: 1 to 2 days once prior gates close.
7. Trial or go-live and handoff. The vendor completes a small first engagement, an internal owner confirms invoices match agreed terms, and the account moves from “onboarding” to “active” in vendor management. SLA target set to the first invoice occurring within about a month of go-live, tracked as a completion metric.
Pro Tip: Steps 3 and 4 don’t have to be fully sequential. Start the compliance review the moment core documents land, rather than waiting for every last certificate. Running them in parallel is one of the fastest ways to shave a week off total cycle time.
How Risk Tiering Shapes the Depth of Review
Not every vendor needs the same level of scrutiny, and treating them all identically is how procurement teams burn weeks reviewing a low-spend office supplier with the same rigor as a cloud vendor holding customer data. Assigning a risk tier at intake lets the workflow automatically load the right questionnaire, evidence list, and approval path instead of forcing a human to decide case by case.
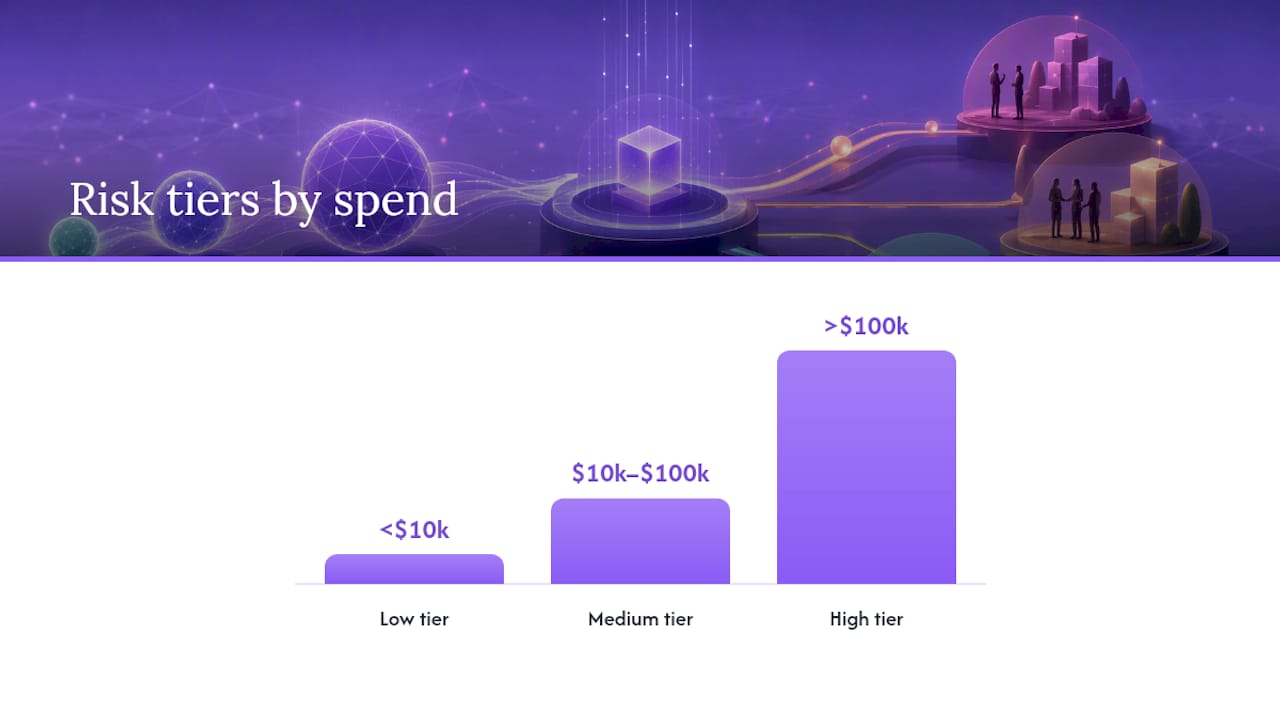
Tier assignment usually comes down to four factors: how much data the vendor can access, annual spend, how critical the vendor is to operations, and whether any regulatory flags apply (health data, payment card data, EU personal data).
A working tier matrix looks something like this:
- Low tier: Under $10,000 annual spend, no data access. Self-attestation form, W-9, basic banking verification.
- Medium tier: $10,000 to $100,000 spend, limited operational data access. Add certificate of insurance and a lightweight security questionnaire.
- High tier: Over $100,000 spend or access to internal systems. Add SOC 2 review, DPA, and legal review of contract terms.
- Critical tier: Access to customer data, payment systems, or core infrastructure. Full security review, penetration test summary or SOC 2 Type II, executive sign-off, and a security schedule with breach-notification terms.
The decision rule is simple: any vendor that touches personal data, payment information, or core infrastructure escalates to full security and legal review regardless of spend size. A $5,000 contractor with admin access to your customer database is a critical-tier vendor, not a low-tier one, and the workflow needs to catch that automatically rather than relying on someone remembering to flag it.
What Documents to Collect and How to Verify Them
The documentation gate is where most fraud gets caught, or missed. Collecting the wrong evidence, or collecting the right evidence without verifying it, defeats the purpose of having a checklist at all.
Core documents, scoped by vendor type:
- All vendors: W-9 (domestic) or W-8 (foreign), banking information, business registration
- Vendors with insurance exposure: Certificate of insurance (COI) with appropriate coverage limits
- IT and data vendors: SOC 2 report (Type II preferred), signed data processing agreement (DPA)
- High-spend or critical vendors: Financial statements or a credit check, references from existing customers
For data-handling vendors specifically, requiring SOC 2 Type II and a signed DPA, plus a security schedule covering multi-factor authentication, encryption, breach-notification windows, and right-to-audit clauses, closes gaps that a basic contract review misses entirely.
Verification matters as much as collection. Bank details deserve a micro-deposit check or third-party bank validation service, never a face-value acceptance of whatever routing number shows up in an email. Insurance certificates should be checked against the issuing carrier when the spend justifies it. Collecting these documents up front rather than requesting them piecemeal later cuts down on the endless follow-up emails that stall most onboarding cycles.
Store everything in a single evidence vault with expiration tracking. A COI that expired eight months ago is functionally the same as no COI at all, and most teams only discover that during an audit. A timestamped audit trail of every approval, not just the final sign-off, is what turns an onboarding record from a filing cabinet into something you can actually defend during a compliance review.
Where Automation Actually Reduces Manual Work
Automation earns its keep at exactly two points in the process: intake validation and evidence collection. Those two steps generate the largest volume of repetitive manual work, and they’re also where errors compound into downstream delays. A self-service portal with real-time validation replaces scattered email threads and spreadsheet trackers with a system that checks tax ID formatting, flags missing fields, and routes completed submissions automatically.
The minimal viable automation setup follows one sequence: intake form, validation logic, then ERP/AP sync. Get that chain working before layering on anything more elaborate. Priority automation patterns include:
- Vendor self-service intake forms that reject incomplete submissions on the spot
- Real-time tax ID and bank detail validation before a human ever sees the record
- Automated routing to the correct approver based on risk tier
- ERP and AP sync so approved vendors flow straight into the payment system
- SSO or SCIM provisioning for vendors who need system access, without manual account creation
This is where a workflow execution tool differs meaningfully from a task tracker. EasyFlow runs the actual handoffs, sending a vendor a magic link to submit documents without forcing them to create an account, then automatically routing the completed submission to the next approver. Pair that pattern with a contractor onboarding friction reduction approach and the same magic-link mechanism that works for contractors extends naturally to vendors who need to submit tax forms or sign a DPA without ever touching your internal systems.
Pro Tip: Don’t automate the compliance review itself first. Automate the boring, high-volume steps (intake and document collection) and leave judgment calls in human hands until you trust the data feeding into them.
Who Owns Each Approval and What to Measure
Clear ownership prevents the “who’s supposed to approve this” limbo that stalls half of all onboarding delays. Mapping each step into a swimlane by function, rather than leaving ownership implicit, exposes exactly where a vendor record is sitting and why.
- Requester: Initiates intake, confirms business need
- Procurement: Owns intake review, pre-screening, and vendor master maintenance
- Legal: Owns contract terms and security schedule language
- Finance/AP: Owns banking verification and payment system setup
- IT: Owns system access provisioning and SSO/SCIM configuration
Recommended SLA targets scale with tier: 3 to 5 business days total for low-tier vendors, 7 to 10 for medium tier, and 10 to 20 for high or critical tier where legal and security review adds real time.
Track cycle time per gate, not just total onboarding time. That distinction matters because a 20-day total tells you nothing about where the 20 days went. Also track percentage of vendors completing within SLA, time to first payment, and document completeness rate at first submission. That last metric is a strong proxy for how well your intake form is actually working.
The Bottlenecks That Slow Onboarding Down, and Quick Fixes
Three bottlenecks account for most onboarding delays: missing intake fields that trigger follow-up requests, legal redlines on standard contract language, and bank validation loops that drag on for days.
Fixes that work without a system overhaul:
- Make the intake form a hard gate. No submission, no review starts. This alone eliminates the back-and-forth of collecting missing fields one at a time.
- Pre-approve standard contract clauses for low and medium tier vendors so legal only reviews exceptions, not every contract from scratch.
- Apply tiered review consistently so low-risk vendors never wait in the same queue as critical ones.
- Route bank validation through an automated portal check instead of manual email confirmation.
Pro Tip: Run a two-hour audit of your last 10 onboarded vendors. Note which gate each one sat in longest. That single pattern almost always points straight at your biggest bottleneck, and it’s rarely the one people assume.
A One-Page Checklist to Start This Week
You don’t need a full platform rollout to start improving onboarding. A short pilot on real vendors surfaces your biggest process flaw fast and gives you evidence before you ask for budget on anything bigger.
- Draft a standard intake form requiring legal name, tax ID, category, and estimated spend
- Assign a tier to every new vendor at intake, using the criteria from your risk matrix
- Name one owner per gate (procurement, legal, finance, IT) with a documented SLA
- Set up a single evidence vault for documents and approvals, even if it’s just a shared folder to start
- Select 10 upcoming vendors as a pilot group and track cycle time per gate
Required intake fields to gate work behind, no exceptions: legal entity name, tax ID, banking information, category of spend, and a data-access flag.
A tight pilot like this proves the model works before you scale it across every vendor category.
Why Onboarding Deserves Treatment as a Real Capability
Most procurement teams treat onboarding as overhead, something to get through so the real work of vendor management can start. That framing gets it backward. Onboarding is where you either catch a problem vendor or you don’t, and every hour spent chasing a missing W-9 six months into a contract is an hour you didn’t spend negotiating better terms elsewhere.
Building onboarding as a repeatable capability, rather than a one-off task list, frees procurement to focus on vendor performance and cost, instead of paperwork triage. Teams that automate the intake and documentation gates typically see the biggest gains in the first 30 days, since that’s where the volume of repetitive work concentrates.
If you’re running onboarding manually today, pilot a tiered workflow on your next 10 vendors and measure cycle time per gate before you touch anything else. The data will tell you exactly where to automate first.
— Harsh
Run Your Vendor Onboarding Workflow Without the Manual Chasing
EasyFlow is the alternative to spreadsheet trackers and inbox-based approvals for vendor onboarding: it executes the workflow steps described above instead of just listing them on a task board. Vendors get a magic link to submit tax forms, insurance certificates, or a signed DPA without creating an account, and each completed step routes automatically to the next approver, whether that’s legal, finance, or IT.
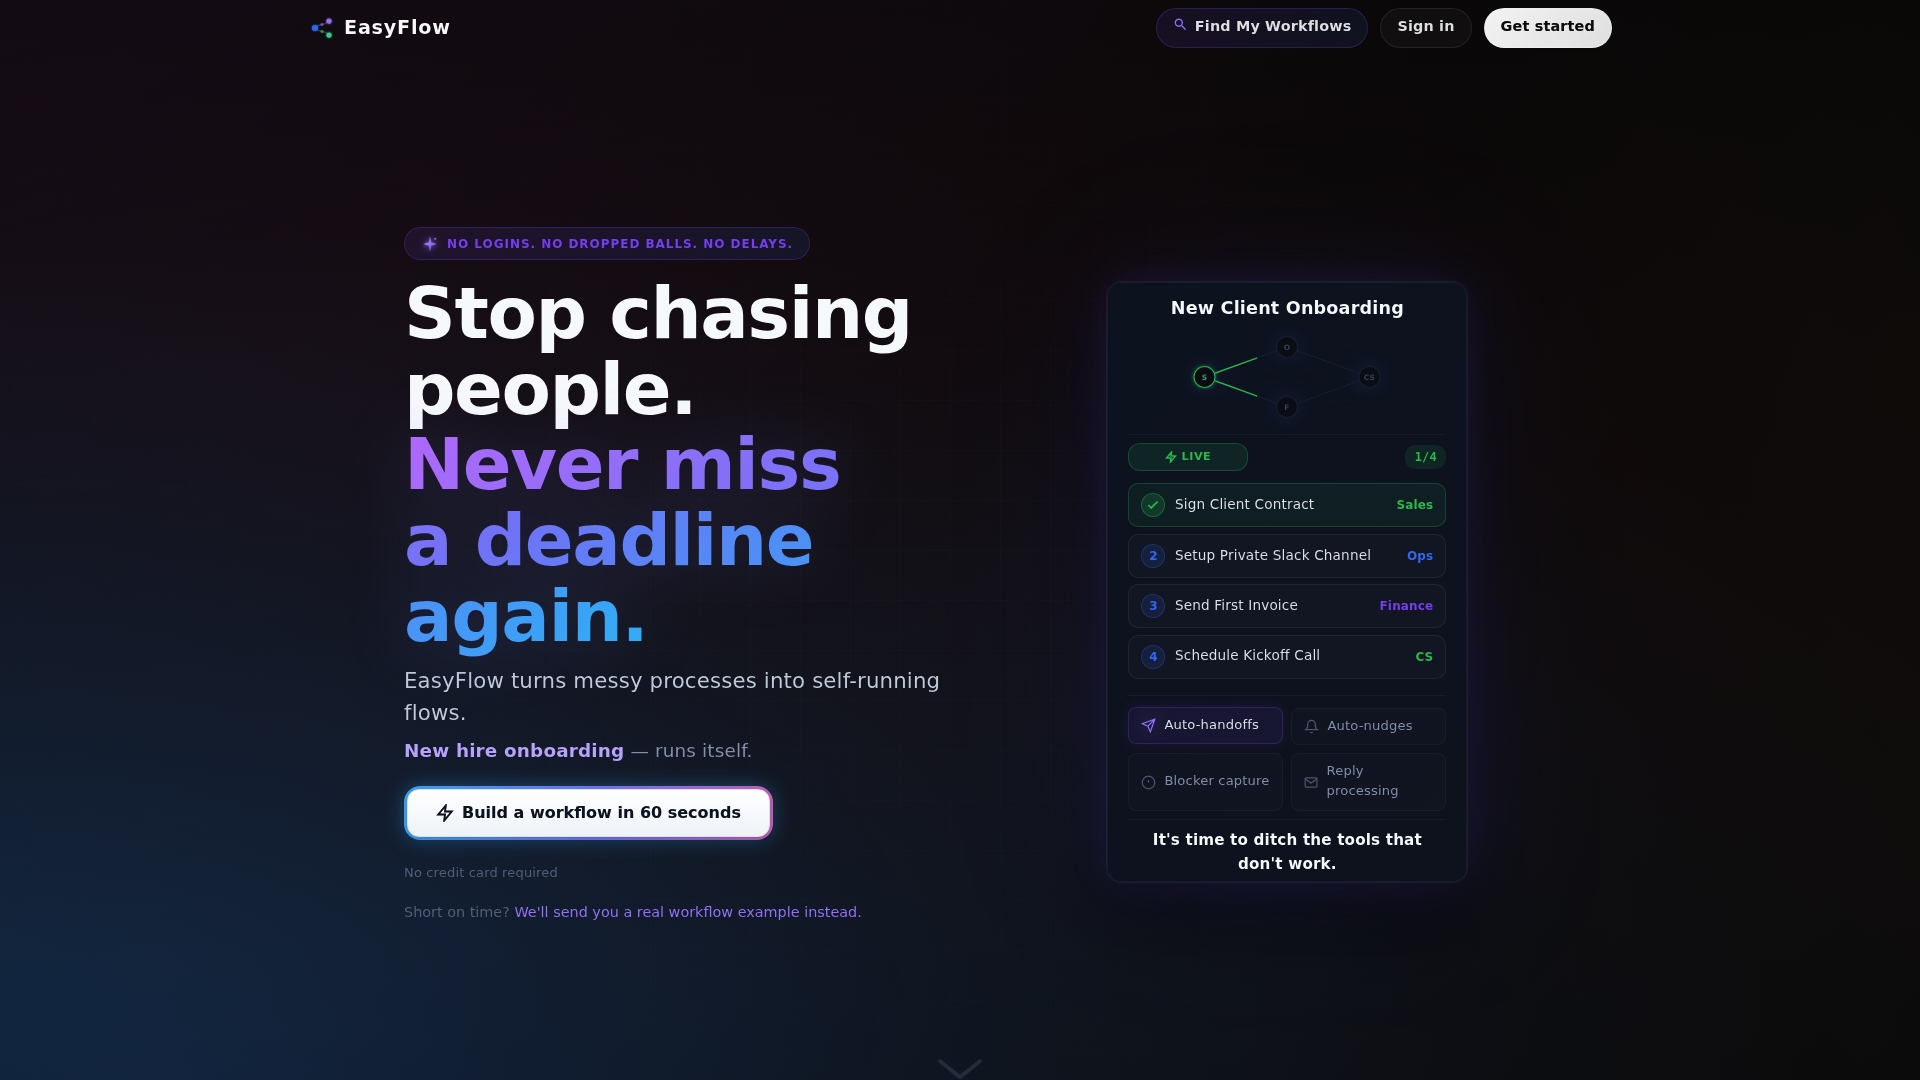
Teams use pre-built templates to map the 7-step process into stages with owners attached, then sync approved vendors into their ERP or AP system once every gate clears. If you’re running onboarding through email threads and shared spreadsheets today, a 14-day trial on your next 10 vendors is enough to see where cycle time actually drops. Start a free trial and run your first tiered onboarding batch this month.
Sources
- Vendor onboarding: A Step-by-Step Process for procurement teams | Vanta
- Supplier and vendor onboarding: A quick guide to building a better process | Stripe
- Vendor Onboarding Process: Step-by-Step Guide 2026 | Appdeck
- Vendor onboarding process flow | Swimlane Guide for SMEs | Vendorfi
FAQ
What Are the Stages of Vendor Onboarding?
The core stages are intake, pre-screening for duplicates, documentation collection, compliance and risk review, contract sign-off, system setup, and trial or go-live, forming the 7-step process outlined earlier in this guide.
What Is Risk Tiering in Vendor Onboarding?
Risk tiering sorts vendors into low, medium, high, or critical categories based on data access, spend, and criticality, then automatically applies the matching depth of review and evidence requirements.
How Long Should Vendor Onboarding Take?
With a standardized intake process and automation handling validation and routing, most vendors can be onboarded in 5 to 15 business days, though critical-tier vendors with full security review often take longer.
Can Vendor Onboarding Be Automated Without a Full System Overhaul?
Yes. Starting with intake validation and document collection, the two highest-volume manual steps, delivers the fastest gains, and a tool like EasyFlow can execute those handoffs through magic links before you touch your ERP integration.
What Documents Are Required for Vendor Onboarding?
At minimum, a W-9 or W-8, banking information, and business registration; data-handling vendors also need a SOC 2 report and a signed data processing agreement.